Table of Contents
Submodels
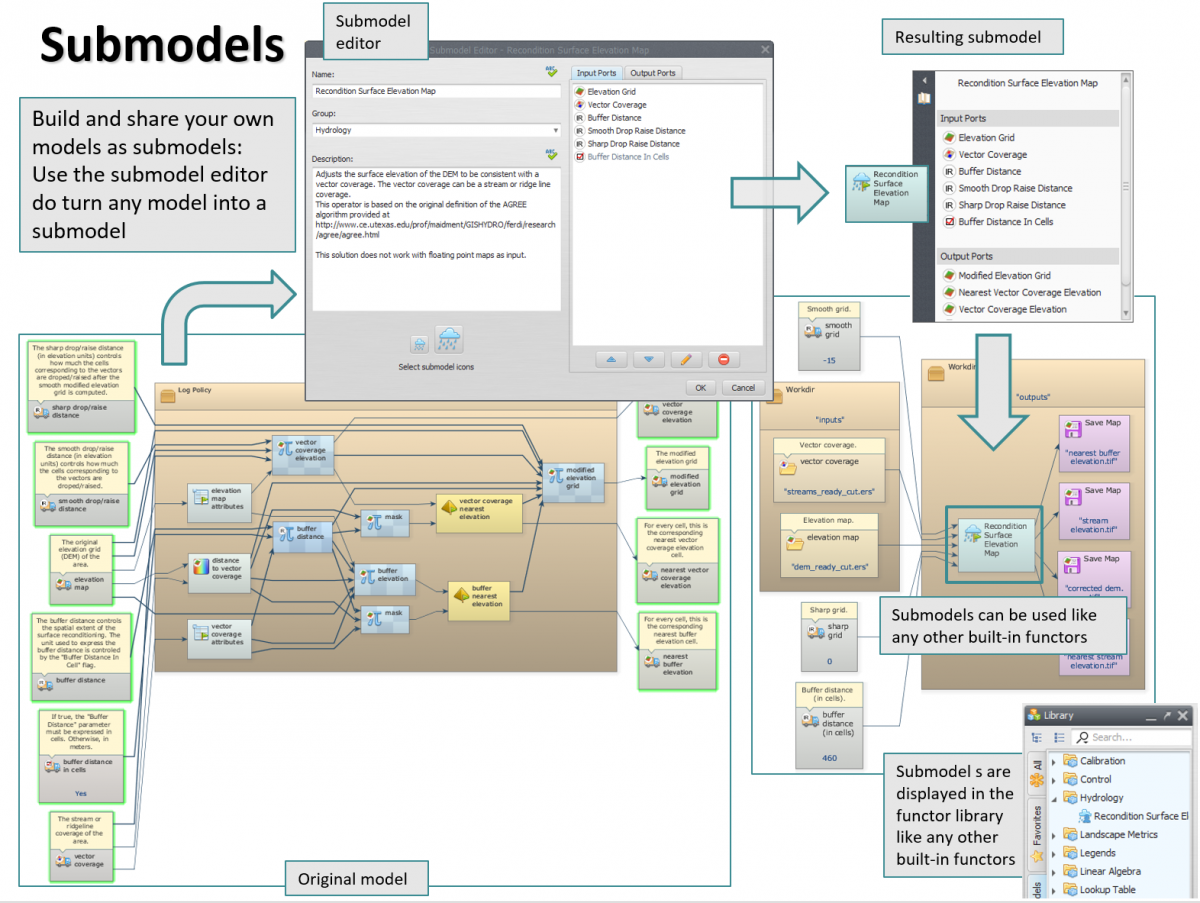
Submodels are a way of reusing parts of a model to perform specific operations inside other models.
By using them, we can reduce the amount of work we have to put on when creating models that share similar functionalities. They are also an important tool for abstraction, hiding unnecessary details and making easier to reason about the model concept and its implementation.
Conceptually, a submodel is a combination of functors exporting inputs and outputs to be bound externally, but, from the user point of view, a submodel is used just like any other ordinary functor.
Submodels are also first class citizen that can be transferred from one model to another. They can also be modified and updated at any time without breaking the model where they are being used. They can also depend on other submodels, as long as their definition do not form a cycle.
Submodel Types
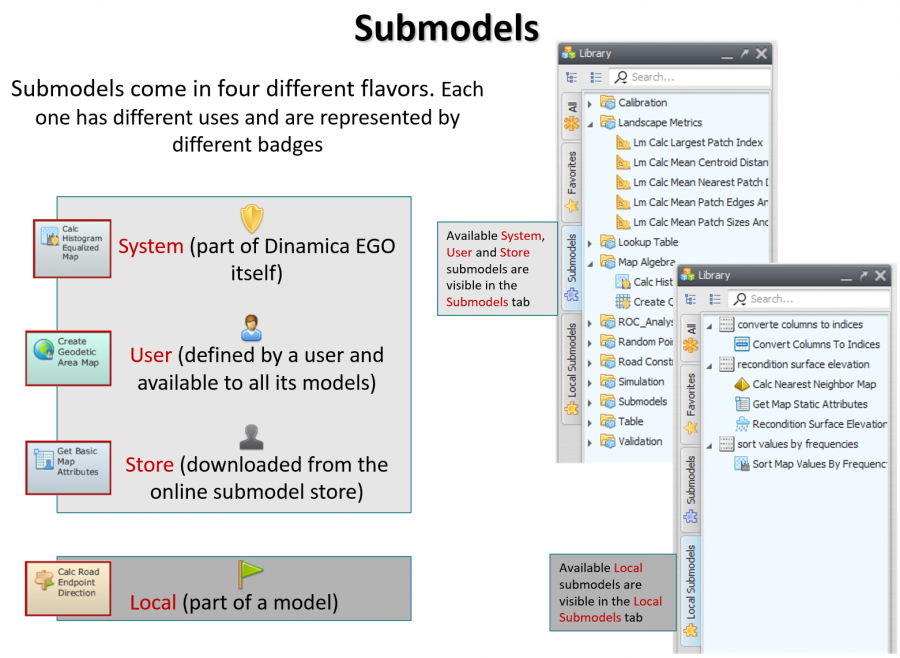
Basically, we have three different types of submodels in Dinamica EGO: system submodels, user submodels and local submodels. The different types of submodels are identified by different icon badges on the representation of the corresponding functors on the model.
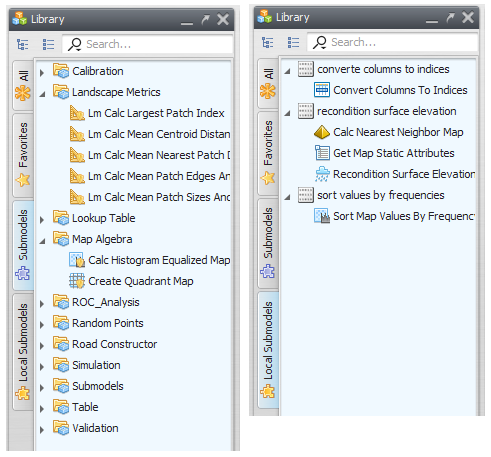
System and user submodels are presented in the “Submodels” tab while local submodels are presented in the “Local Submodels” tab of the Functor Library. Local submodels are only presented when their associated model is opened.
In practice, users can only create local submodels. These local submodels can later be promoted to user submodels making them a definitive part of the user's tool set.
Where Local Submodels Are Stored
Local submodels are stored in a folder based on the model name. If the model containing the local submodel is named simulation model.egoml, its local submodels will be stored in a subfolder called simulation model_egoml_Submodels. Basically, the name construction algorithm just replaces “.” with “_” and appends “_Submodels” to the name. Using a unique submodel folder for each model guarantees that submodels from one model are completely independent from the submodels from any other model. Local submodels can also be defined in a folder called “Submodels” located in the same folder where the model file is located, and shared shared among all the models located in that folder. However, the folder is automatically converted into an unique submodel folder when the model is saved by the graphical interface.
User submodels are stored typically in the folder c:\<User>\Documents\Dinamica EGO\Submodels.
Store submodels are stored typically in the folder c:\<User>\AppData\Local\Dinamica EGO\StoreSubmodels.
Creating Local Submodels
Local submodels can be created by simply selecting the parts of a model that will be converted to a submodel and choosing the menu Edit ⇒ Create Submodel. The selection will be replaced by the new submodel and the visual representation of the new submodel will be available to be edited as a new tab on the script editor.
At any time, the user can make changes to the local submodel and apply those changes clicking on “Apply changes / Update Submodel Properties” on the model toolbar. See more information about updating a local submodel on the next sections.
It is also possible to select parts of a local submodel and create another local submodel using that selection. The new local submodel will be a dependency of the previous one, but the submodel creation process is basically the same.
If the selection is empty, an empty local submodel will be created. The process for updating an empty submodel is the same process used to update any local submodel.
Instantiating Local Submodels
Local submodels from a model are placed in a special tab on the functor library called “Local Submodels”. These local submodels are grouped by model name.
To instantiate a local submodel as part of a model, just expand the group on the “Local Submodel” corresponding to the current model and drag the submodel functor representation to the model presentation area.
It is worth noting that, dragging the functor represention belonging to a different model, will import the definition of the local submodel from that model.
Navigating Submodels
Navigating between the local submodels and the main model in a script editor can be done by clicking on the corresponding model/submodel tab on the model/submodel tabs or clicking on the submodel overview button above the model/submodel tabs.
Updating Local Submodels
At any time, the user can add or remove inputs and outputs or even change the combination of functors defining the submodel.
The functor action bar of all functors contained inside a submodel script exhibits additional options for “exporting functor inputs and outputs”. Exporting a new input or output can be performed following the steps below:
First, click on the functor whose inputs or outputs will be exported.
Select the “export functor inputs and outputs” on the functor action bar and choose the input or outputs that will be exported. It is possible to define the input and output names and their corresponding descriptions. It is also possible to mark an exported input as advanced or optional. Optional inputs can also define an optional value that will be assigned to the port if no explicit value is provided.
Choose the “Submodel Options” submenu on the model toolbar and then click on “Apply Changes / Edit Submodel Properties”. That brings the submodel editor dialog where you can define a new name, description and icon for the submodel or reorder its inputs and outputs (or even remove some of them). Clicking “Ok” propagates the changes to all parts of your model (and dependent submodels) where the submodel is used.
Below you can see two examples of updating the inputs and output ports of a local submodel.
Example 1)
Example 2)
Beware that connected inputs cannot be exported. They must be disconnected first.
It is also worth noting that it is possible to safely rename inputs and outputs. The connections to the port will be maintained when the changes are propagated.
IconSamples in your Dinamica EGO installation folder
When updating a local submodel, the changes from all dependent local submodels will also be propagated. It means that updating a submodel always updates the whole chain of local submodels that uses that submodel as part of their definition.
Removing ports from a local submodel is also similar to updating the exported ports. You can remove the ports using “export functor inputs and outputs” option on the functor action bar and unchecking the corresponding port on the “Exported Ports” dialog or using the “Apply Changes / Edit Submodel Properties” dialog.
Changing the order of the inputs or output ports can only be done by editing the port list on the “Apply Changes / Edit Submodel Properties” dialog.
Local Submodel Dependencies
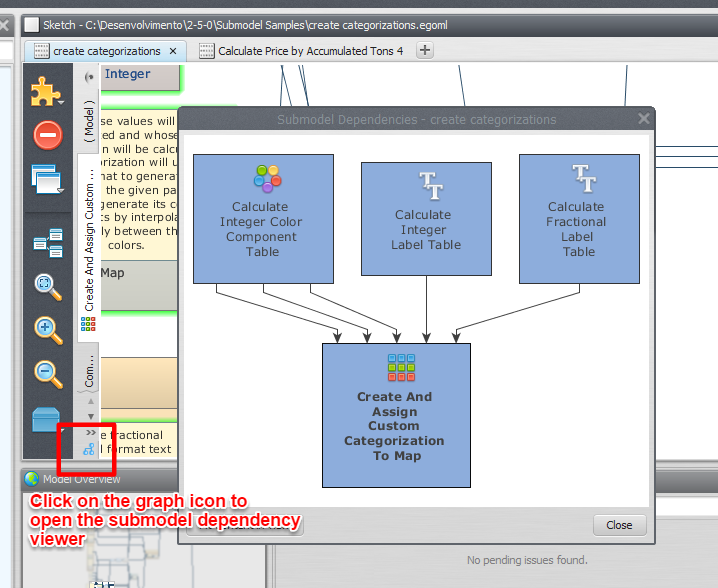
Since local submodels can use other local submodels as part of their definitions, it is very convenient to know how the local submodel dependencies are organized. You can view that just clicking on the graph icon at the bottom of the model toolbar.
On the dependency graph viewer, all local submodels are represented by their names and corresponding icons. An arrow pointing from a submodel A to a submodel B means that the submodel A is used by the submodel B. Multiple arrows mean that a local submodel is used more than once.
Copying (Importing) a Local Submodel Between Models
It is possible to copy local submodels definitions between models. Once the submodel is copied from one model to another model, the submodels can be modified and updated independently.
You can copy a local submodel definition by dragging a local submodel from the functor library to the model presentation area. The process is similar to the instantiation of a regular functor.
It is also possible to copy the submodel definition by clicking on the “Import submodel definition” button on the functor library bar of the local submodel tab of the functor library. The definition of system submodel and system submodels can also be imported using the corresponding “Import submodel definition” button on the functor library bar of the submodel tab of the functor library.
Turning a Local Submodel into a User Submodel (Publishing)
Once your local submodel was developed and fully tested, you can turn your local submodel into a user submodel.
To publish a local submodel into a user submodel, click on the “Publish Submodel” button on the submodel “Submodel Options” drop down menu located on the model toolbar.
Turning a local submodel into a user submodel make reusing a submodel easier, the submodel will always be available to be used on your next models, but it have some drawbacks as well. You are fully responsible for the consequences of updating a user submodel. Beware, that unlike local submodels, your models will not carry a copy of a user submodel as part of their definition. So, if you change a user submodel in a way that breaks compatibility with the model using its definition, your models will not work anymore.
